Day 2
Matica, Zebra & Seaory Printer Troubleshooting
Ink Sensor Recalibration, Diagnostics, Firmware & Technical Support
🖨️ Matica MC3x0 Series
MC310, MC320 & MC320x Troubleshooting
🔧 MC320x Ink Sensor Recalibration
This utility forces a ribbon recalibration when required. Different printer models may show different error codes.
📋 Step-by-Step Calibration
- Go to Printers and Scanners through Windows Settings
- Select your printer (e.g., MC210, MC320)
- Click Printer Properties
- Go to the Tools tab
- Click Browse
- Locate the PRN file:
RibbonCalibration - Jan 2024.prn
*.PRN to *.* (All Files) to find the calibration file.
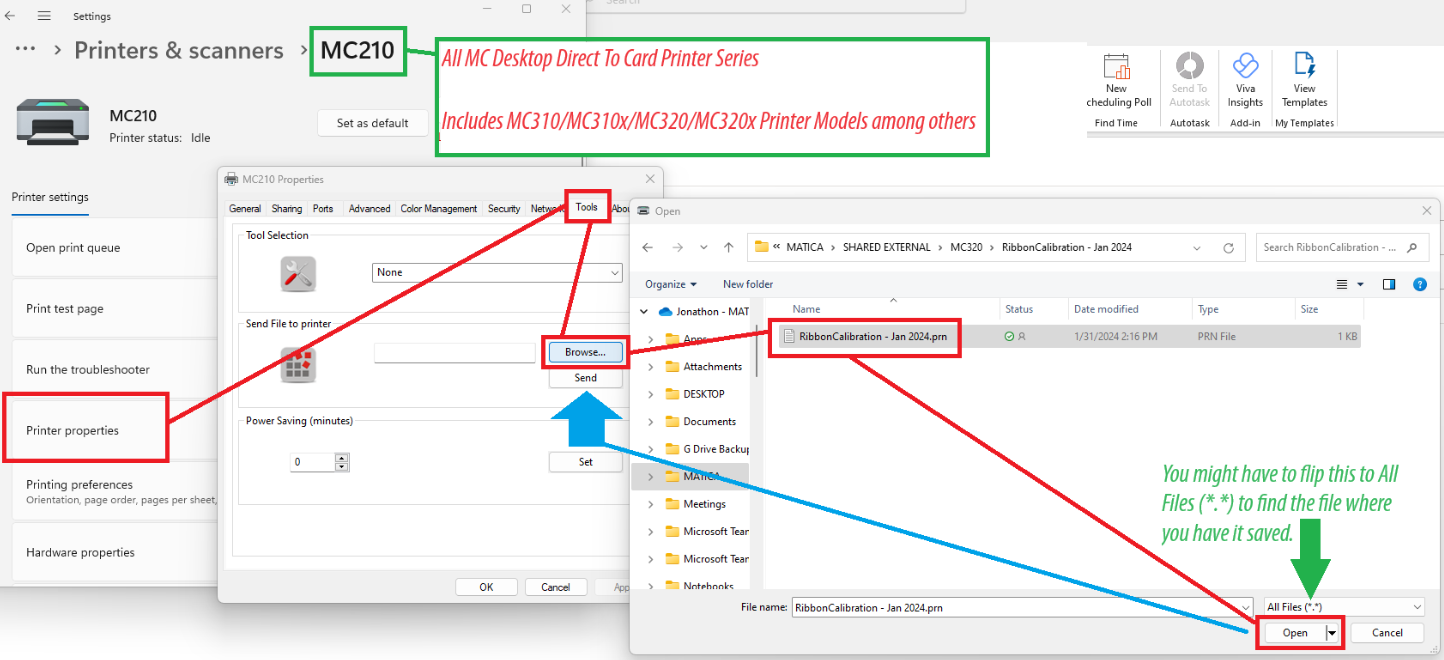
- Click Open
- Back in the Tools tab, click Send
- Printer may reinitialize - wait for completion
- Power off the printer
- Wait a few seconds
- Power on the printer
📥 Download Calibration File
📄 RibbonCalibration - Jan 2024.prn🔌 Printer Does Not Power On
| Problem | Solution |
|---|---|
| Printer does not power on | Disconnect and reconnect the power cables, ensuring electricity supply is present |
🖨️ Printer Has Printing Problems
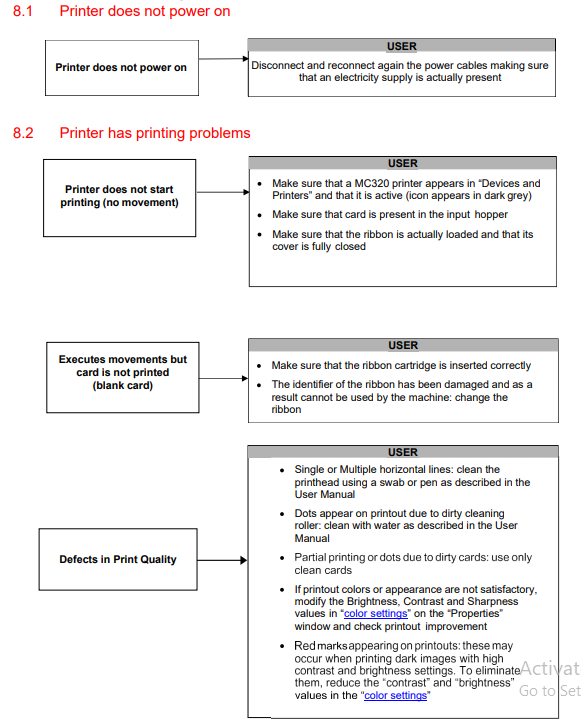
Printer Does Not Start Printing (No Movement)
| Check | Action |
|---|---|
| Printer visible in Devices | Ensure MC320 appears in "Devices and Printers" and icon is not grayed out |
| Card present | Make sure a card is in the input hopper |
| Ribbon loaded | Verify ribbon is properly installed and cover is fully closed |
Executes Movements but Card is Blank
| Check | Action |
|---|---|
| Ribbon cartridge | Ensure ribbon is inserted correctly |
| Ribbon damage | If ribbon identifier is damaged, replace the ribbon |
Defects in Print Quality
| Problem | Solution |
|---|---|
| Horizontal lines | Clean printhead with swab or pen as per User Manual |
| Dots on printout | Dirty cleaning roller - clean with water |
| Partial printing | Dirty cards - use only clean cards |
| Colors unsatisfactory | Adjust Brightness, Contrast, Sharpness in "color settings" |
| Red marks on dark images | Reduce "contrast" and "brightness" values |
🔄 Ribbon Problems
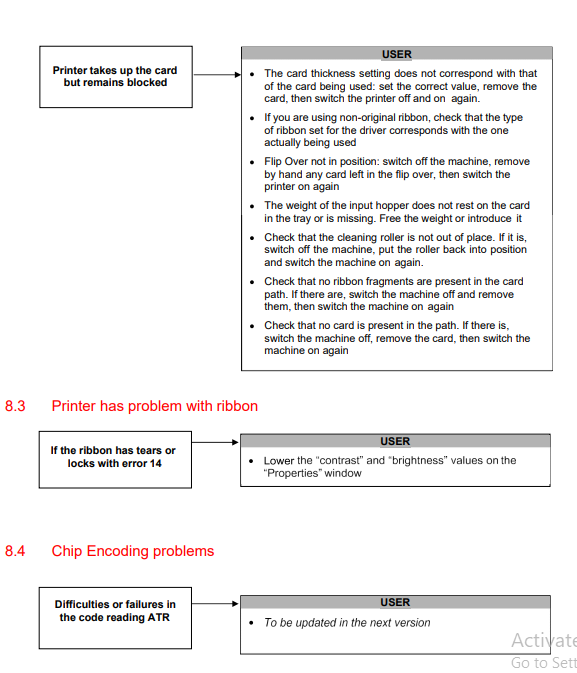
Card Takes Up But Remains Blocked
| Check | Action |
|---|---|
| Card thickness | Verify thickness setting matches actual cards; remove card, power cycle |
| Ribbon type | If using non-original ribbon, ensure driver ribbon setting matches |
| Flip over position | Switch off, remove any stuck card by hand, switch on again |
| Input hopper weight | Ensure weight rests properly on cards |
| Cleaning roller | Check if out of place; reposition and power cycle |
| Ribbon fragments | Check card path for fragments; remove and power cycle |
| Stuck card | Check for card in path; remove and power cycle |
Ribbon Tears or Locks with Error 14
| Solution |
|---|
| Lower the "contrast" and "brightness" values in the Properties window |
💳 Chip Encoding Problems
| Problem | Status |
|---|---|
| Difficulties or failures in code reading ATR | To be updated in the next version |
💾 Firmware Downloads
🔄 Calibration Files
| File | Description | Download |
|---|---|---|
| RibbonCalibration - Jan 2024.prn | Forces ribbon sensor recalibration | Download |
🦓 Zebra ZXP Series 3 Support
Firmware, Calibration & Troubleshooting
💾 Zebra Firmware Update
How to update firmware on the Zebra ZXP Series 3 printer.
- Go to your computer's Devices and Printers folder
- Right-click on the Zebra ZXP Series 3 printer and choose Printer Properties
- Click on the Device Settings tab, then click Tools
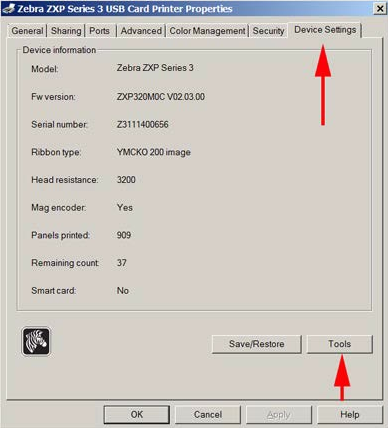
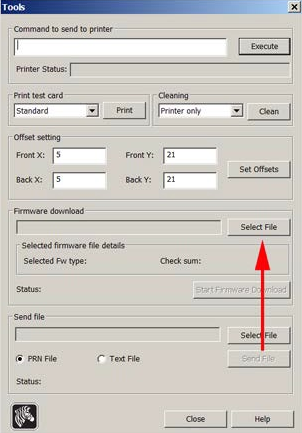
- Click on Select File. Browse to the firmware file that you downloaded from the Zebra website
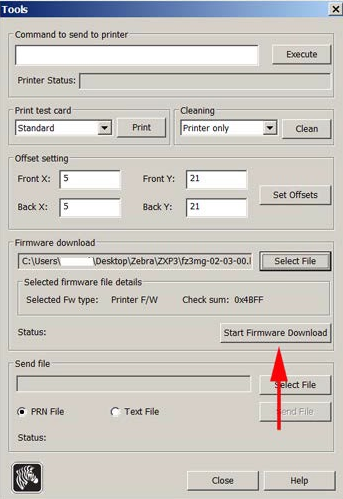
- Click on Start Firmware Download to begin updating the firmware
🔥 Zebra Print Head Power Adjustment
How to adjust the print head power on a ZXP Series 3 to resolve print quality issues.
- Go to your computer's Devices and Printers folder
- Right-click on the Zebra ZXP Series 3 printer
- Choose Printing Preferences from the menu
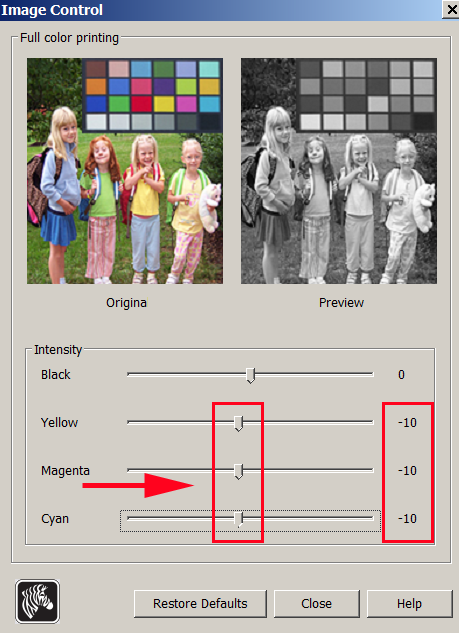
- Click on the Image Control tab
- Reduce or increase the intensity of the Yellow, Magenta, and Cyan heat settings using the slider bars
- Click Apply, then OK to save these settings
🔄 Zebra Ribbon Sensor Calibration
How to calibrate the ribbon sensor on a Zebra ZXP Series printer.
- Windows XP: Go to Start menu → Printers and Faxes. Right-click on your Zebra printer and select Properties
- Windows 7+: Go to Start menu → Devices and Printers. Right-click on your Zebra printer and select Printer Properties
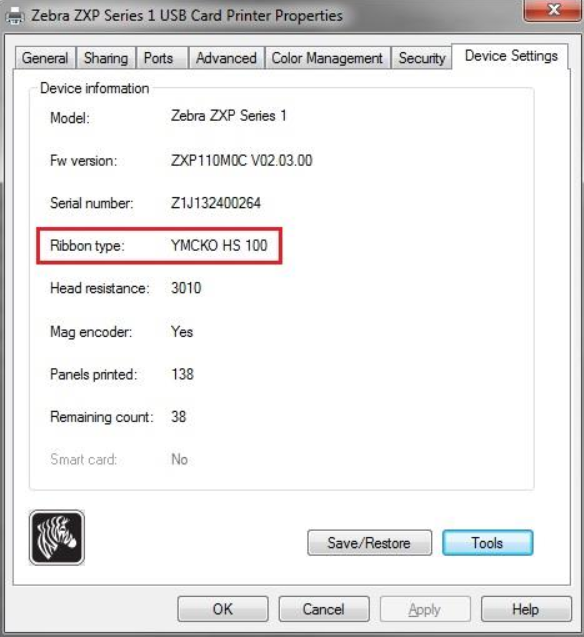
- Go to the Device Settings tab. Under Ribbon Type you should see your ribbon (e.g., YMCKO)
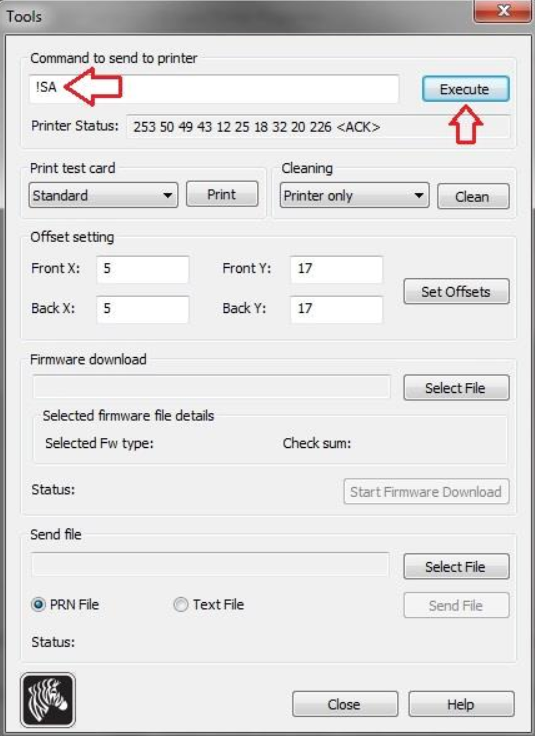
- Click on Tools
- In the Command to Send to Printer box, type:
!SA - Click Execute. The printer will run the calibration process automatically
🔄 Zebra Breaking Ribbon Resolution
Steps to resolve ribbon breaking issues on Zebra ZXP Series 3.
- Update drivers and firmware to the newest versions
- Clean your printer - Regular cleaning keeps out dust and debris which can damage the print head
- Check ribbon loading - Ensure the ribbon is set correctly in the printer
- Adjust print head power - See the Print Head Power Adjustment section above
- Try different supplies - If you have a different ribbon and extra cards, try switching them out
- Check card size - Ensure your cards are not CR-79 sized, which can cause problems
🃏 Zebra Card Jam Resolution
Steps to resolve card jam issues on Zebra ZXP Series 3.
- Update drivers and firmware to the newest versions
- Clean your printer - Regular cleaning keeps out dust and debris which can damage the print head
- Check power supply - Ensure you are using the correct power supply (each printer comes with a power supply)
- Check surge protector - Make sure the printer is NOT plugged into a surge protector
- Check card size - Ensure your cards are not CR-79 sized, which can cause problems
🖨️ Seaory Printer Support
R Series & S Series Technical Documentation
📚 Seaory Training Manuals
Complete after-sales training documentation for Seaory R series and S series card printers.
R Series Training Manual (60 pages)
S Series Training Manual (139 pages)
📞 Seaory Support Process
Standard operating procedure for handling Seaory printer support cases.
Step 1: Tech Support Troubleshoots
- Tech Support speaks with the customer and tries to fix the issue over the phone.
- If that doesn't work, Tech Support reaches out to Seaory for instructions on how to fix the issue (software/settings).
- Seaory provides clear step-by-step guidance often with images directly to the Tech Support rep.
Step 2: If a Part Needs to Be Replaced
If the issue is due to a small or easy-to-replace part, and the customer is comfortable:
- Tech Support guides them through how to install it.
- Tech Support asks Customer Service to create a $0 Shopify order to ship the part.
If the issue is more complicated and the customer can't fix it themselves, move to Step 3.
Step 3: Seaory Sends Full Repair Instructions
Seaory sends detailed repair steps and photos to:
- Brandon (Repair Team)
- CC: jack@feryllc.com
Step 4: Customer Service Coordinates the Printer Return
If the printer needs to be sent in for repair:
- Customer Service offers a free shipping box if needed.
- They create the Shopify order for the shipping label and box.
- They walk the customer through how to send the printer back to us.
Step 5: Two Options for the Customer
| Option 1: Fastest - Replacement Printer | Option 2: Same Unit Return |
|---|---|
|
|
⚠️ Seaory Ribbon Error - Code 48
Complete troubleshooting guide for ribbon-related errors on Seaory printers.
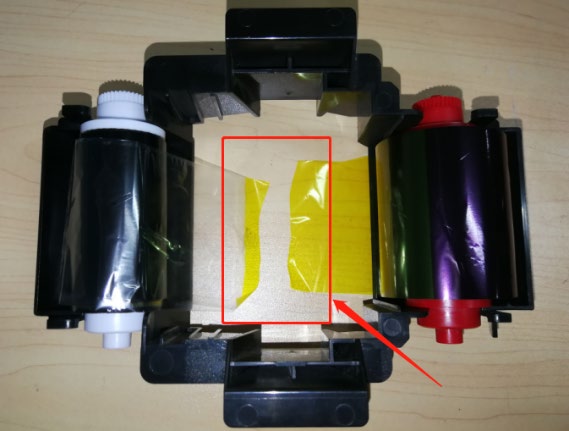
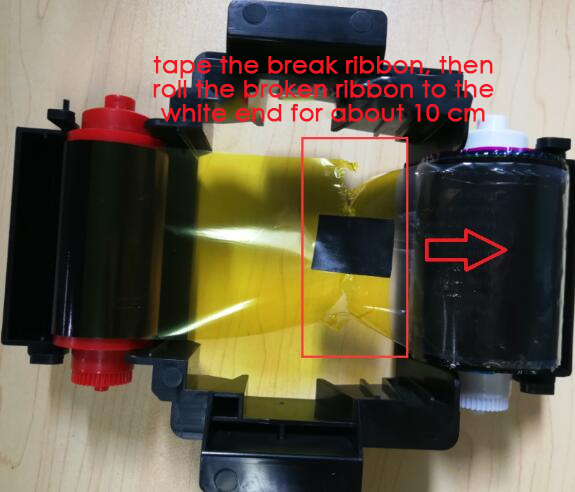
Cause 1: Ribbon Broke While Printing
| Problem | Solution |
|---|---|
| Ribbon broke while printing | Remove the ribbon, tape the break, then roll the broken ribbon to the white end for about 10 cm. |
Cause 2: Sensor Parameter Decay
| Problem | Solution |
|---|---|
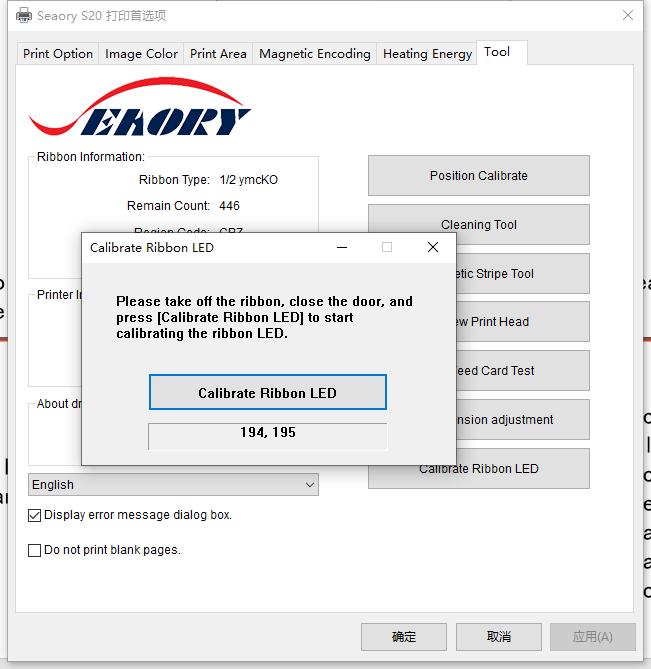
| Sensor parameter decay | Click the Calibrate in the driver tools of the Ribbon LED for correction. Normal light value should be around 195, 195. |
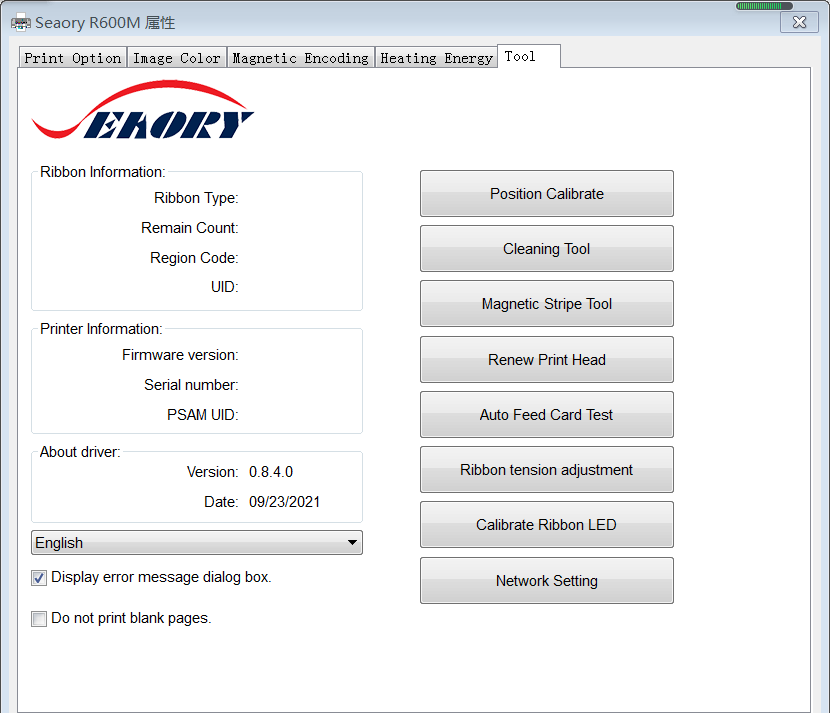
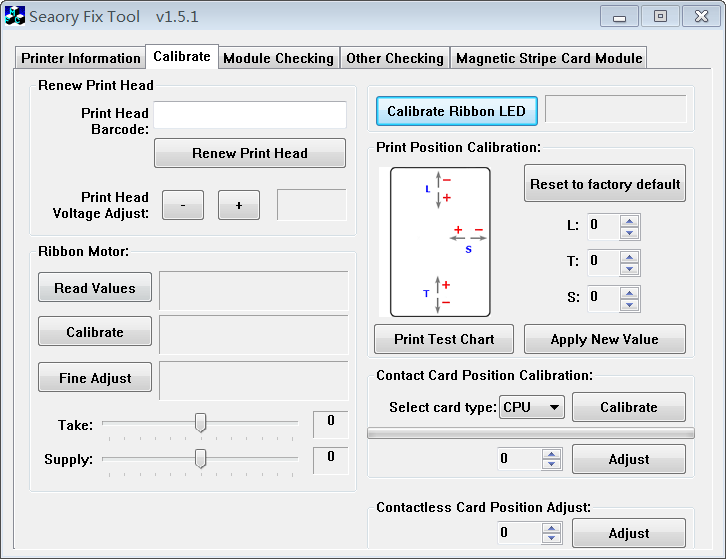
Expected Ribbon LED Values:
| Color | Example (Abnormal) | Normal Range |
|---|---|---|
| Y (Yellow) | 32, 182 | ~195, 195 |
| M (Magenta) | 27, 15 | ~195, 195 |
| C (Cyan) | 166, 39 | ~195, 195 |
| K (Black) | 8, 10 | ~195, 195 |
| O (Overlay) | 186, 195 | ~195, 195 |
Cause 3: Sensor Cable Loose or Sensor Damage
| Problem | Solution |
|---|---|
| Sensor cable loose or sensor damage | After calibration failed and light value showed 0, check sensor cable. If the line is no problem then the sensor is damaged - replace it. |

Cause 4: Ribbon LED Bracket Deformation
| Problem | Solution |
|---|---|
| Ribbon LED bracket deformation | Wrench the Ribbon LED bracket to the normal angle. |
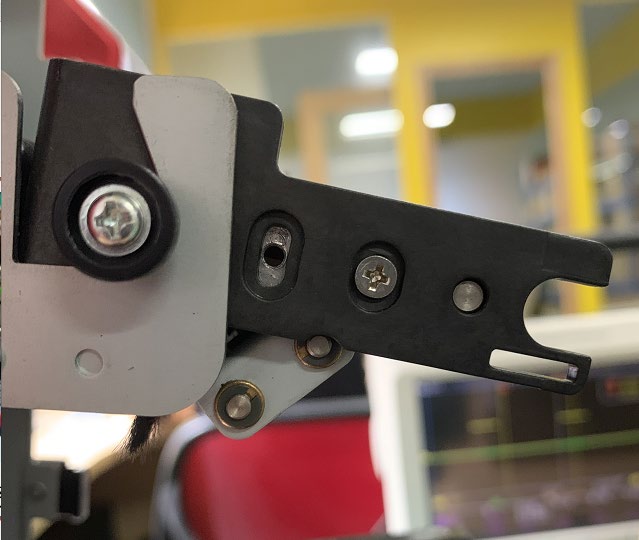
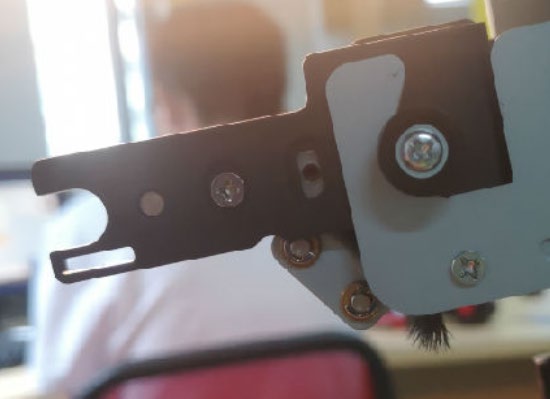
🎬 Video Guide: LED Bracket Adjustment
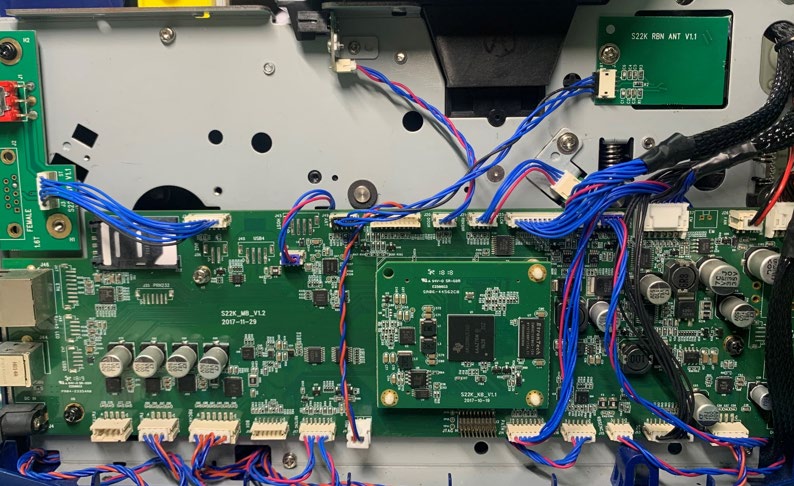
Cause 5: Poor Core Board Contact
| Problem | Solution |
|---|---|
| Poor contact with core board causing gear jams | Re-plug the core board. |


Cause 6: Motor Cable or Motor Damage
| Problem | Solution |
|---|---|
| Supply/pick-up motor cable abnormal or motor damage (color ribbon) | If no problem with the cable, please replace the motor. |

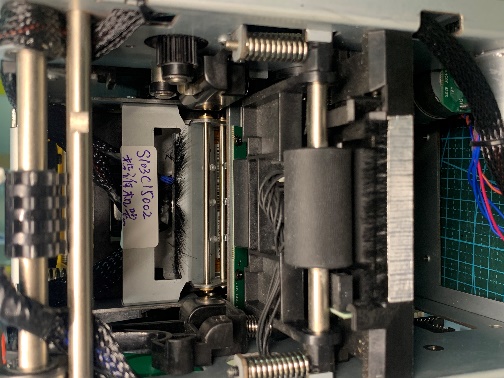
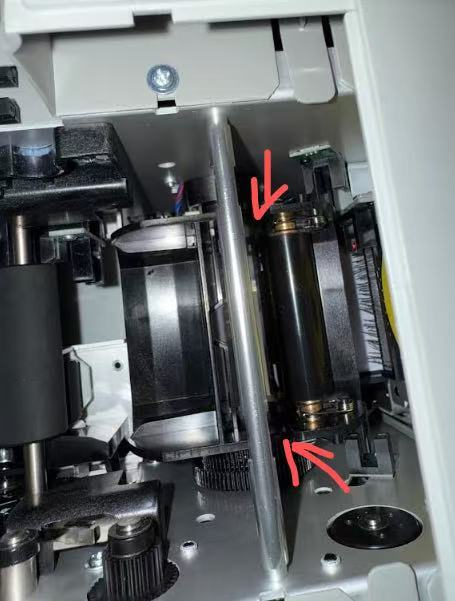
Cause 7: Foreign Body in Gears
| Problem | Solution |
|---|---|
| Foreign body between ribbon supply/pick-up gears (color ribbon) | Remove foreign objects in the gears. |

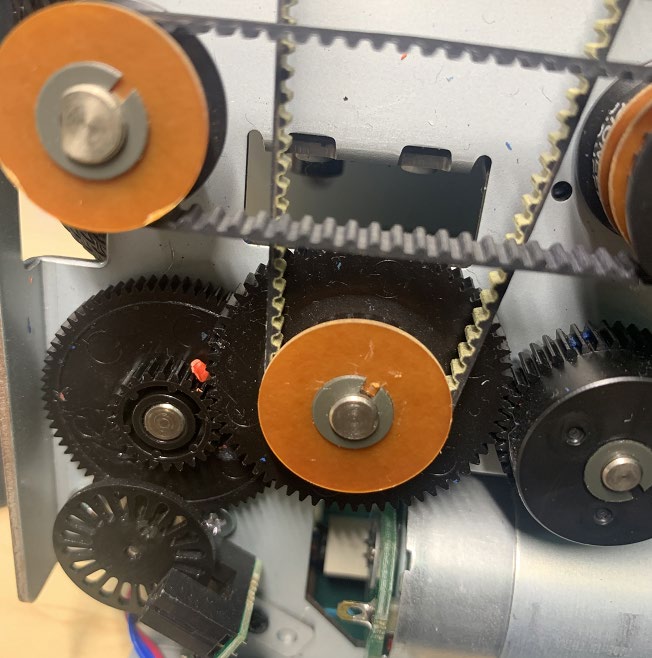
🎬 Video Guide: S25 Ribbon Gear
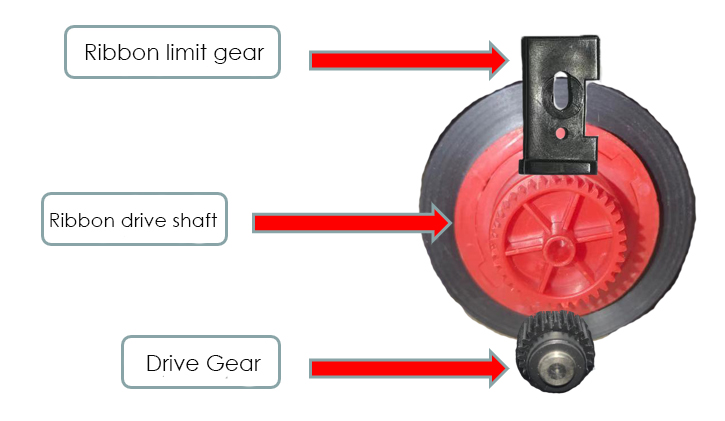
Cause 8: Ribbon Limit Gear Loose
| Problem | Solution |
|---|---|
| Ribbon limit gear loose, continuous jumping teeth (color ribbon) | Continuous "clatter" noise when jumping teeth. Adjust the limit clamping piece according to the limit gear piece adjustment document. |

⚡ Seaory R300 Voltage Measurement
Power supply diagnostics and core board testing for R300 series.
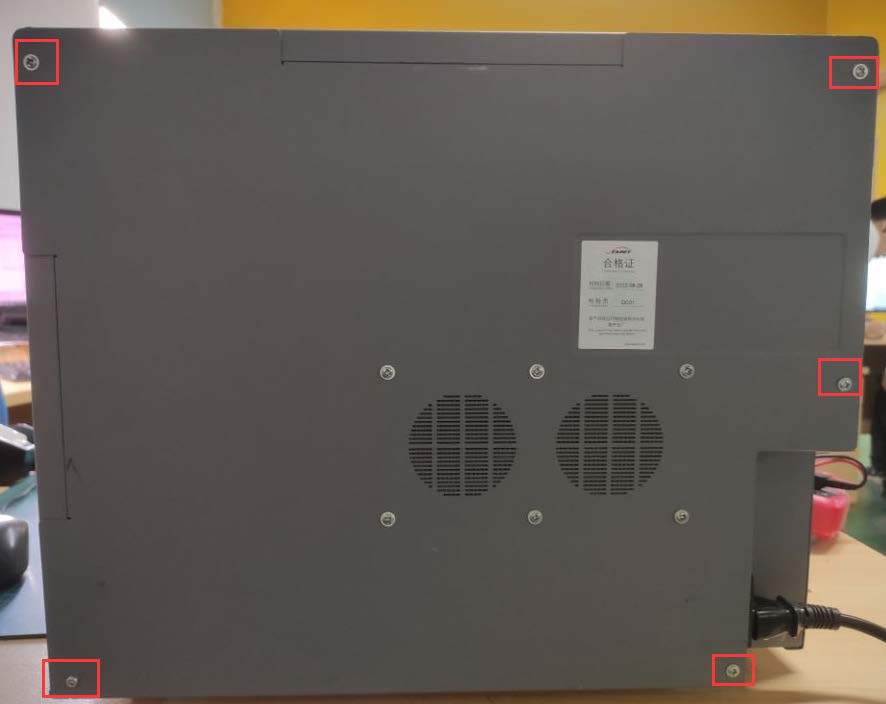
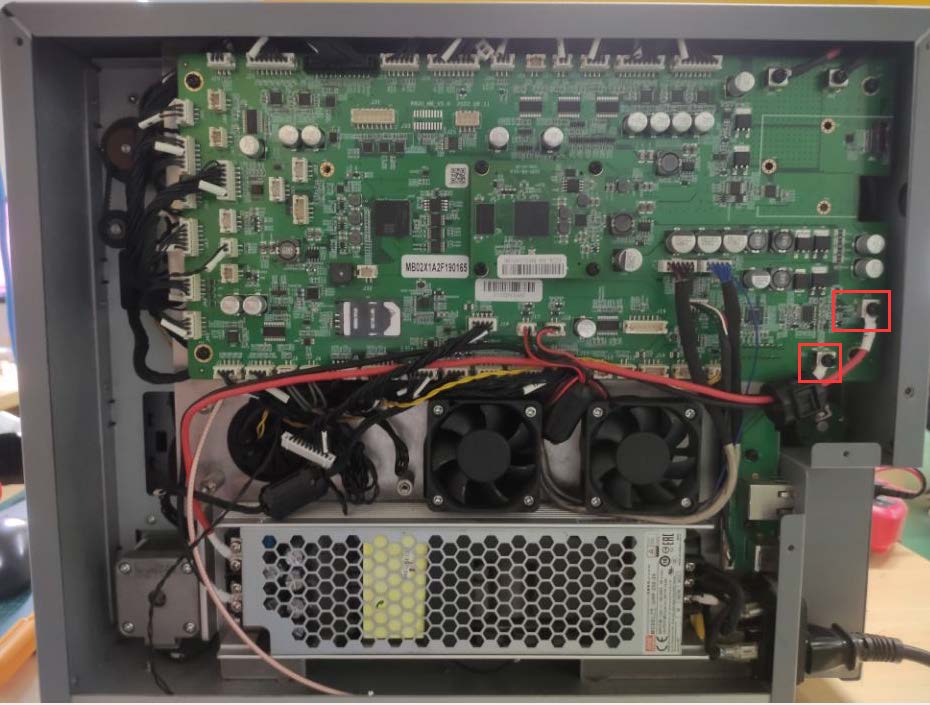
Step 1: Remove the Back Cover
Remove the screws at the red frame mark on the back cover of the printer, then remove the back cover. After removing, you will see the main circuit board and power supply unit.

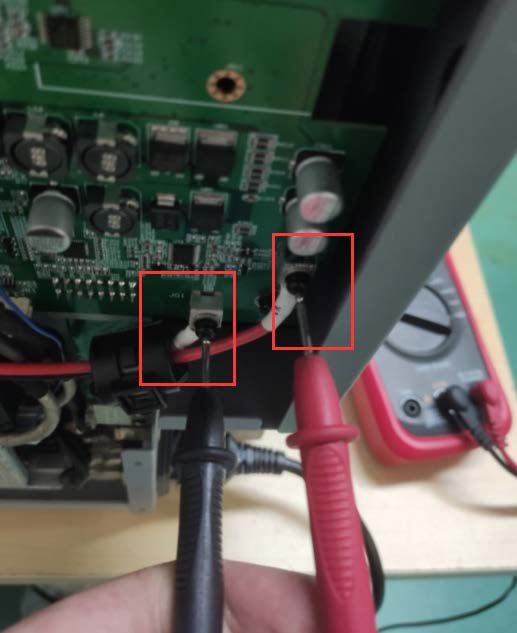
Step 2: Locate Power Switch Connections
Find the positive and negative poles of the power switch marked on the circuit board. Connect the power cord and press the switch.

Step 3: Measure Voltage Output
Adjust the multimeter to the voltage range and measure whether the power output is 24V.

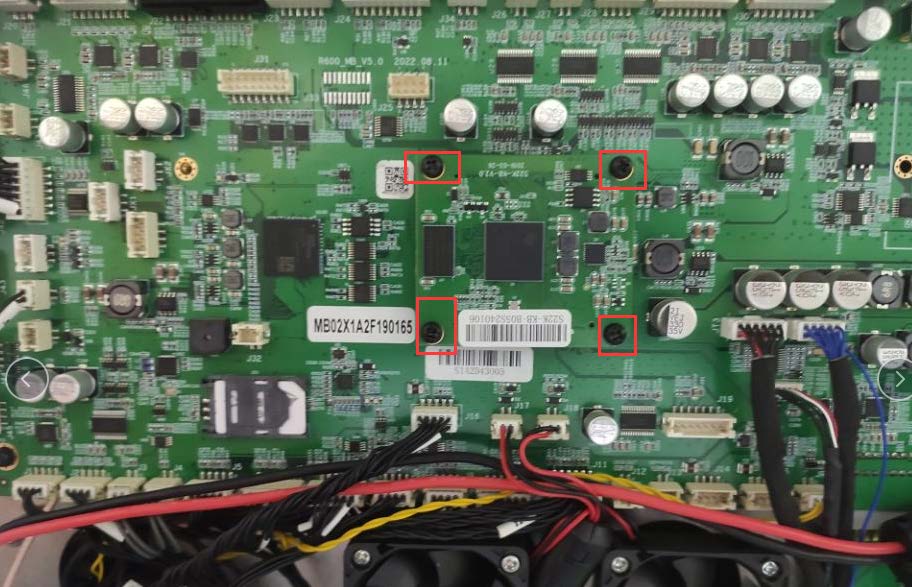
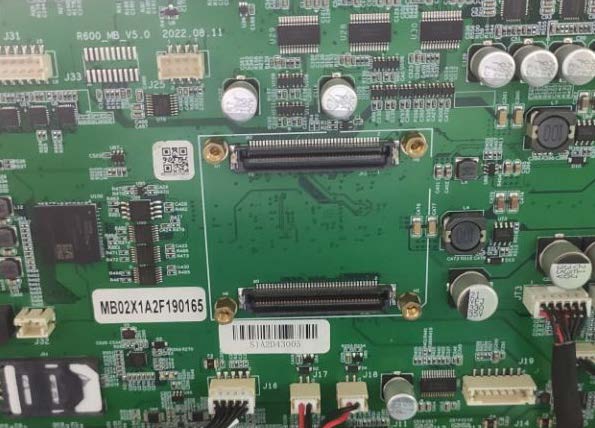
Step 4: Core Board Reinstallation (If Voltage is Normal)
If voltage measurement works normally:
- Turn off the power switch first
- Remove the screws holding the core board
- Remove the core board and install it again
- Turn on the power to check if it is working
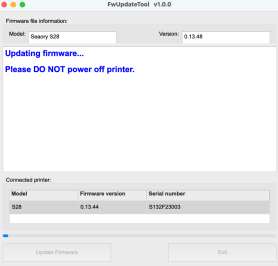
💻 Seaory S28 Firmware Upgrade (Mac OS)
Step-by-step guide for updating Seaory printer firmware on macOS.
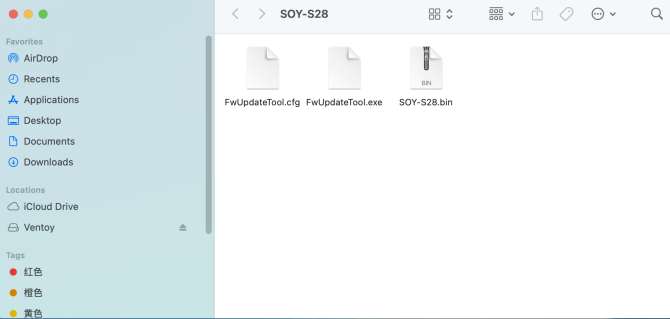
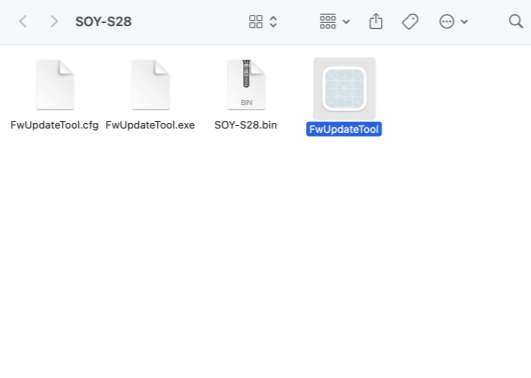
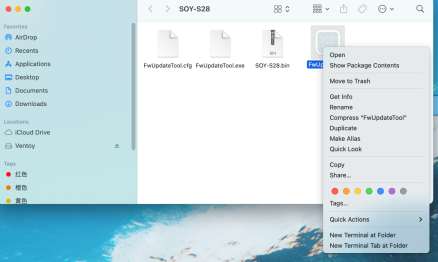
Step 1: Unzip the Firmware Package
Extract the firmware compressed package. You should see files like:
FwUpdateTool.cfgFwUpdateTool.exeSOY-S28.bin
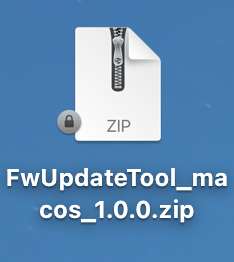
Step 2: Prepare the Firmware Update Tool
Unzip the FwUpdateTool_macos_1.0.0.zip file to get the FwUpdateTool.app, then place it in the S28 firmware folder for executing.
Step 3: Connect the Printer
Turn on the printer and connect it to your Mac via USB cable.
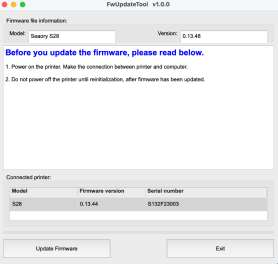
Step 4: Run the Firmware Update
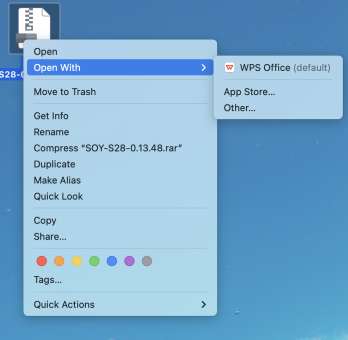
- Right-click to open "FwUpdateTool.app"
- The upgrade tool page will show connected printer info (Model, Firmware version, Serial number)
- Click "Update Firmware" button
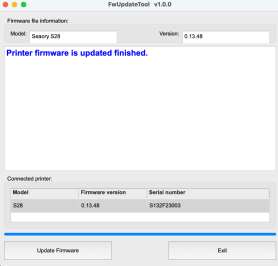
- Wait for "Updating firmware... Please DO NOT power off printer" message
- Wait until "Printer firmware is updated finished" appears
📥 Seaory Downloads & Tools
🔧 Software & Drivers
| File | Description | Download |
|---|---|---|
| Seaory S Series Driver v1.11.0.0 | Windows driver for S series printers | Download (.7z) |
| Seaory Card Printer Driver v1.1.0 | macOS driver for Seaory printers | Download (.dmg) |
| SeaoryFixTool v1.9.2 | Diagnostic and calibration utility | Download (.exe) |
🎬 Video Tutorials
Ribbon LED Bracket Adjustment
S25 Ribbon Gear Inspection
🖼️ Reference Images
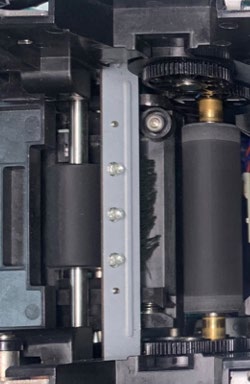
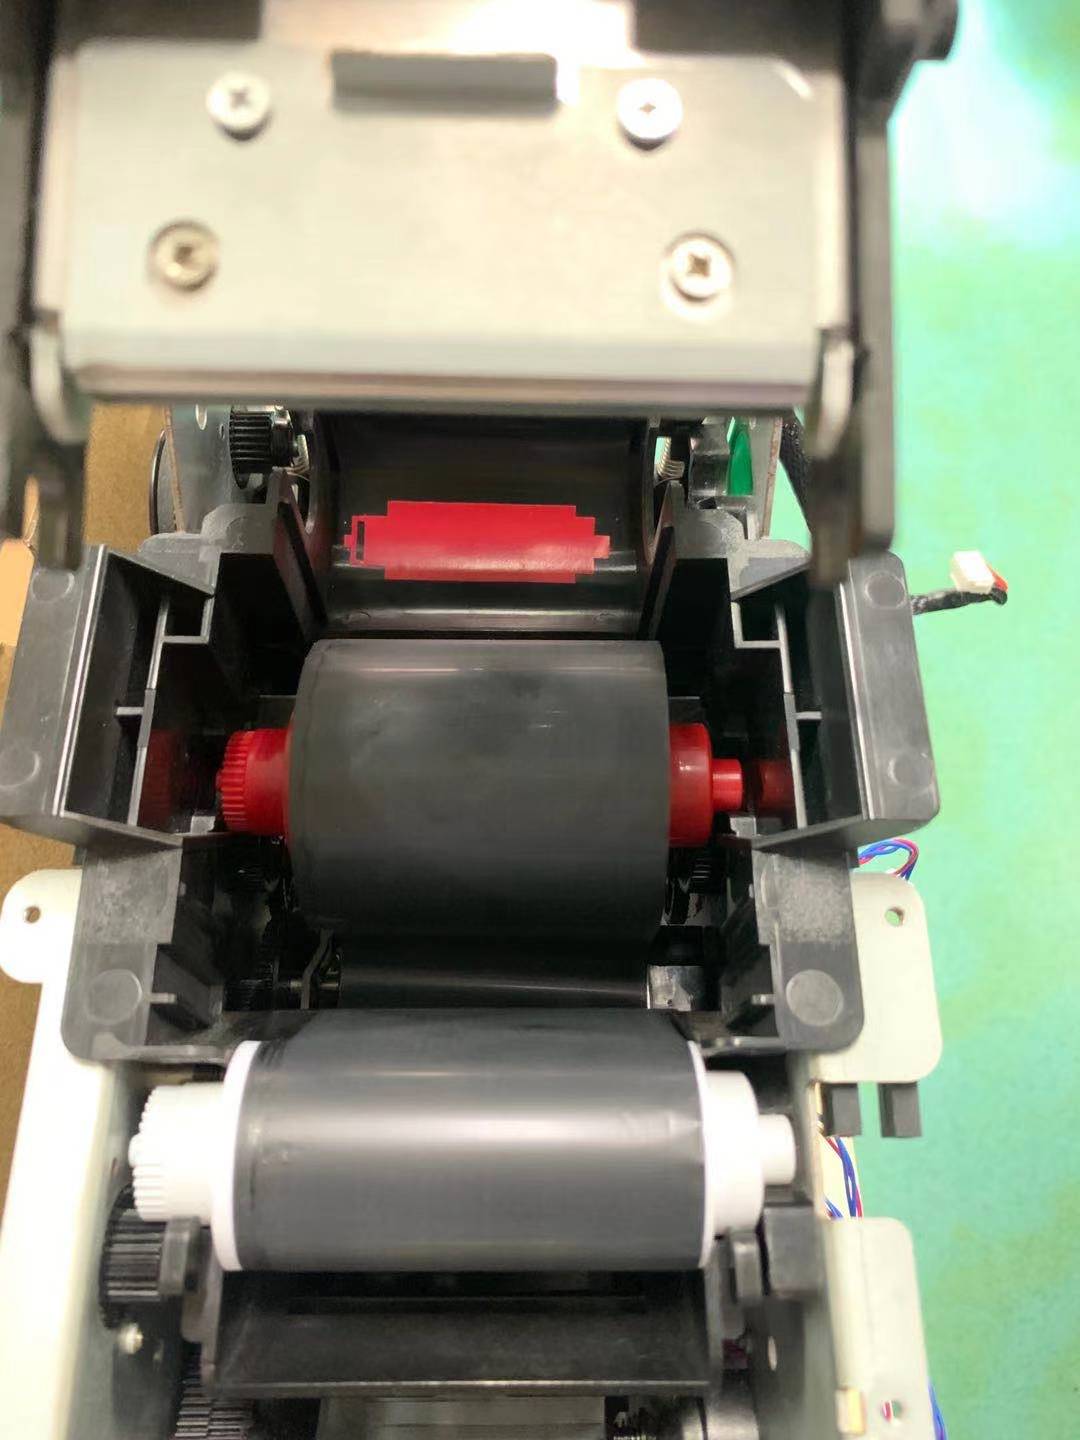
Seaory Cleaning Roller - Replace when visibly dirty or when print quality degrades
End of Day 2 Training